Manage Users (Add, Disable, Permissions)
This guide will walk you through how to add, remove, and manage the permissions of users of your Limelight installation.
Add Users
Users can be added to Limelight in two ways: project users inviting new users to projects and through the administration interface.
Invite Researchers to Projects
The primary way users are added to Limelight is for users of individual projects to invite new users to projects by sending an invitation to their email. This is covered in our user guide for adding researchers to a project. (Link forthcoming).
Note
This method only works if SMTP is configured for Limelight. Please see our Limelight SMTP Setup Guide for more information about setting that up.
Administration Interface
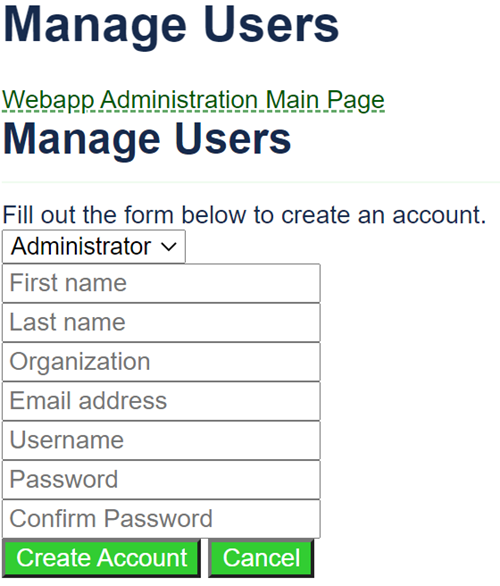
An alternative to inviting researchers to projects is to use the administration interface to create new users. If SMTP is not set up, this is the only option for adding new users to Limelight. To add users to Limelight, follow these steps.
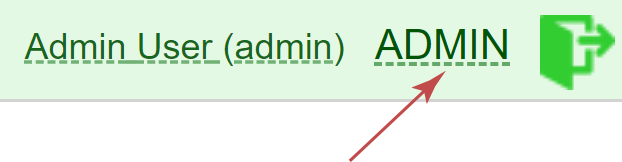
Log into Limelight and click the
ADMINlink in the top-right.
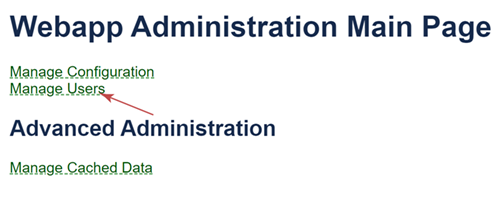
Click the
Manage Userslink.
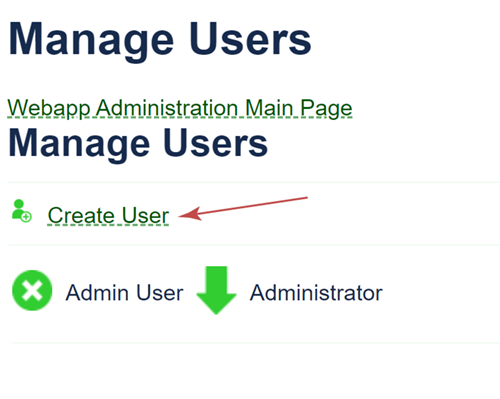
Click the
Create Userlink.
Fill out the form and click
Create Accountto create a new user.
Important
The first field is the type of user to create. Choose User to create a normal
user that has normal user permissions. Choose Administrator to give complete access to
all of Limelight, including all settings and adding and deleting projects and users.
The created user will now be able to log into your installation of Limelight. They can create their own projects or be added to existing projects by the users of existing projects.
Disable Users
Users may be disabled using the administration interface. Disabled users will no longer be able to log into your installation of Limelight. To delete users, follow these steps:
Log into Limelight and click the
ADMINlink in the top-right.
Click the
Manage Userslink.
Click the circle with an
Xnext to the user you wish to disable.
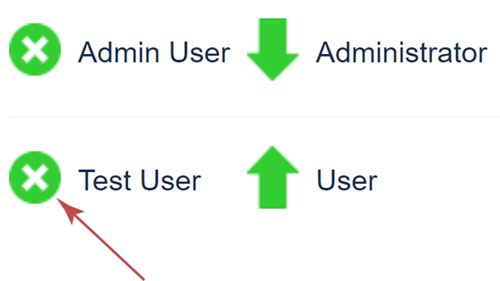
The user will now appear as disabled.
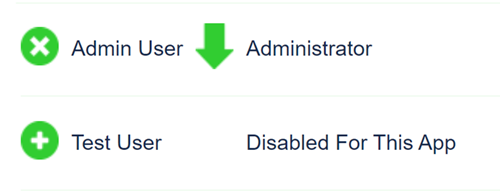
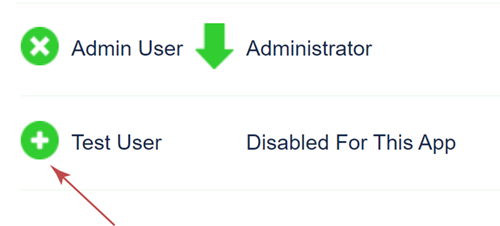
Re-enable Users
To re-enable this user, click the circle with a + next to the user you wish to re-enable.
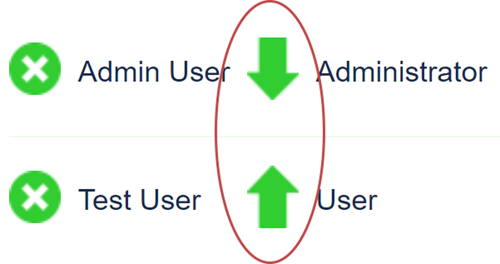
Promote and Demote Users
Important
Administrators have complete access to all of Limelight, including all settings and adding and deleting projects and users. Proceed with caution.
You may promote normal users to Administrators or Administrators to normal users. To promote a user to Administrator, click the up arrow next to the user. To demote an Administrator to a normal user, click the down arrow.